A Guide for GUI.for.Clash
Download the cores
Go to the Settings - Kernel page, the application checks if the core file is present. If the core file does not exist, click on the Update button to download the file. Usually the system's network needs to be proxied in this step
If the download process fails, the user may download the core file manually, rename it to mihomo.exe or mihomo-alpha.exe, place it in the application's data/mihomo folder, and then restart the application
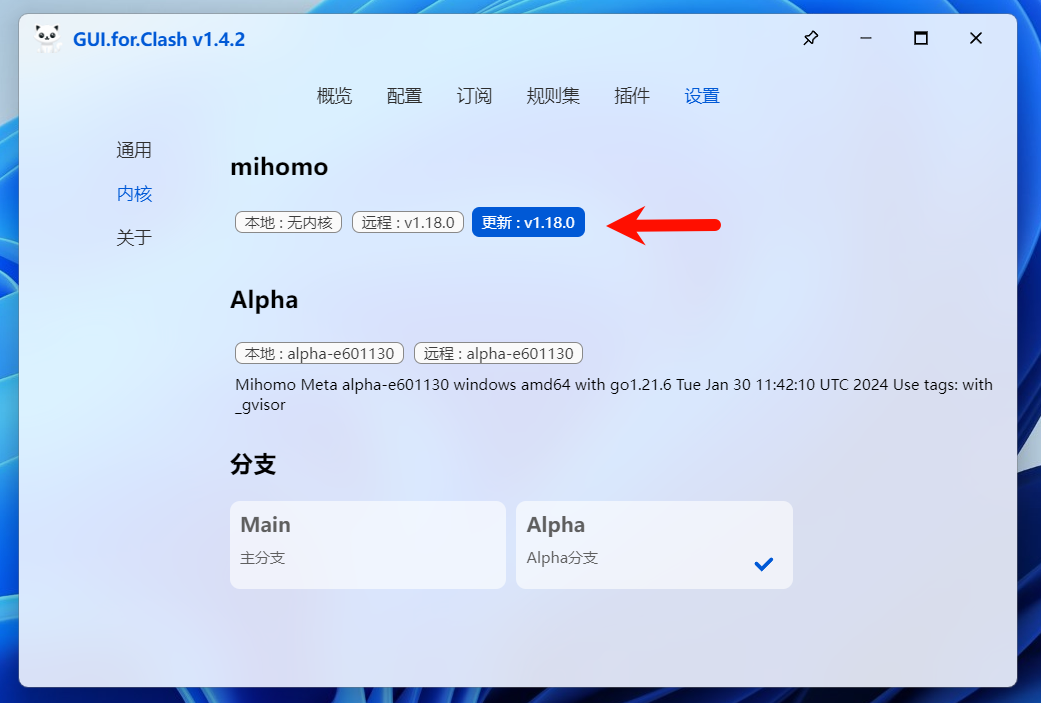
If everything works as expected, the version number of the core should be displayed. The user can switch to a different branch of the core with a single click

Import Proxies
Go to the Overview page, where there is a Quick Start button. Click on it and enter the subscription link. GUI will automatically download the subscription file, read the proxy information, and save it to a yaml file which named with a random ID. At the same time, GUI creates a profile, and links it to the subscription file it just downloaded

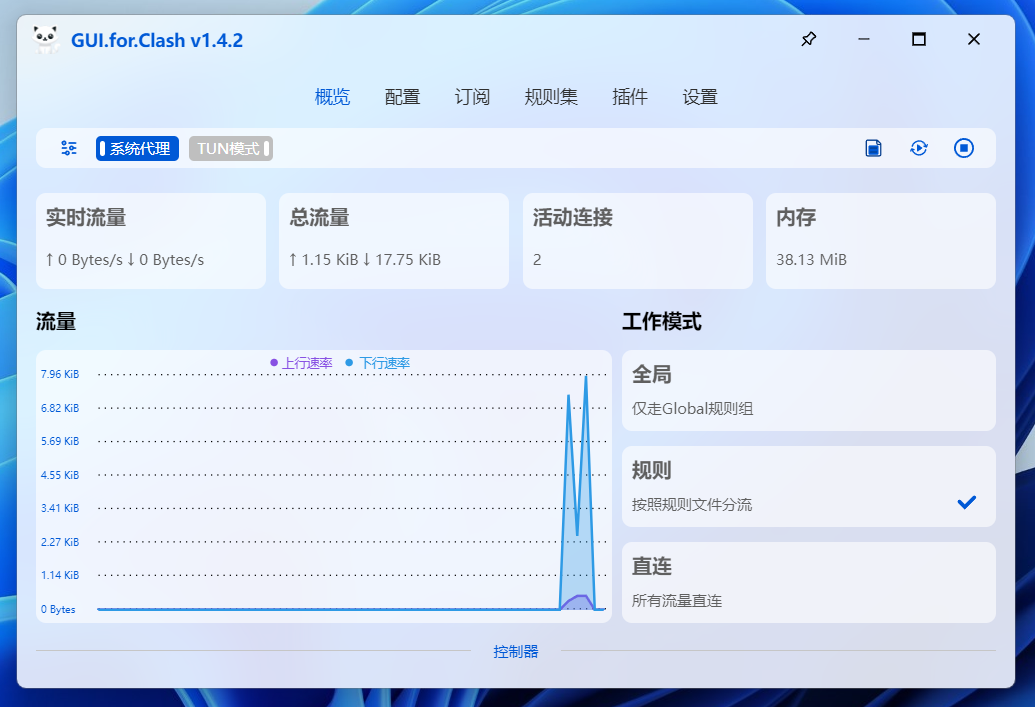
If the last step is followed correctly, click on the start button to start the core

By default, GUI does not change the system configuration automatically. Therefore, System Proxy needs to be manually turned on. However there is also an option Auto Set / Clear System Proxy in the Settings page. If TUN mode is preferred, the option Run as Admin needs to be turned on. Please make sure that TUN mode or System Proxy are not turned on simultaneously
Advanced
The steps above is only for a quick start. If the user wants to know how the application works, follow the instructions of manually creating the subscriptions and profiles
Create a Subscription
Let us create a subscription first. Go to the Subscriptions page, click on the Add button, and fill in the blank fields, the fields marked with * are required
If the Subscription Type is Local, the recommended value for Local Path is data/local/${filename}.txt. When the subscription is updated, the application will read the data from Local Path and save it to Save Path. If the values of Local Path and Save Path are the same, when the subscription is updated, the application will skip the save process and only update the metadata, such as the number of the proxies

After adding the subscriptions, click on the Update button. This saves the data in Local Path to Save Path. Note that GUI only saves the data in the proxies segment
If Use internal proxy-groups and rules is enabled, a profile will be created when the subscription is updated, and the next Create a Profile step can be skipped. However, the profile created this way is managed by GUI and the subscription, any changes made to this profile will be overwritten when updating the subscription!
This Option is for [users who wish to use the proxy-groups and rules from the subscriptions]. Manually creating the profiles is recommended because it is more customizable for the users
Create a Profile
Next, go to the Profiles page, click on the Add button, and fill in the blank fields, the fields marked with * are required. GUI has options for most of the core's parameters. If an option that GUI does not provide needs to be changed, the user can create a plugin to do it. Here is an example:
Create a plugin that can be triggered by onGenerate. For example:
const onGenerate = (config) => {
  // 按下Ctrl+Shift+F12来查看config里有哪些内容
  console.log(config);
  // 增加域名嗅探字段
  config.sniffer = {
    enable: false,
    "force-dns-mapping": true,
    "parse-pure-ip": true,
    "override-destination": false,
    sniff: {
      HTTP: {
        ports: [80, "8080-8880"],
        "override-destination": true,
      },
      TLS: {
        ports: [443, 8443],
      },
      QUIC: {
        ports: [443, 8443],
      },
    },
    "force-domain": ["+.v2ex.com"],
    "skip-domain": ["Mijia Cloud"],
  };
  return config;
};
This plugin executes when a config file is generated, and returns the configuration to GUI
The Name, General, TUN, and DNS fields require no further introduction, please refer to the mihomo user manual. This section mainly covers how to configure rules and proxy-groups
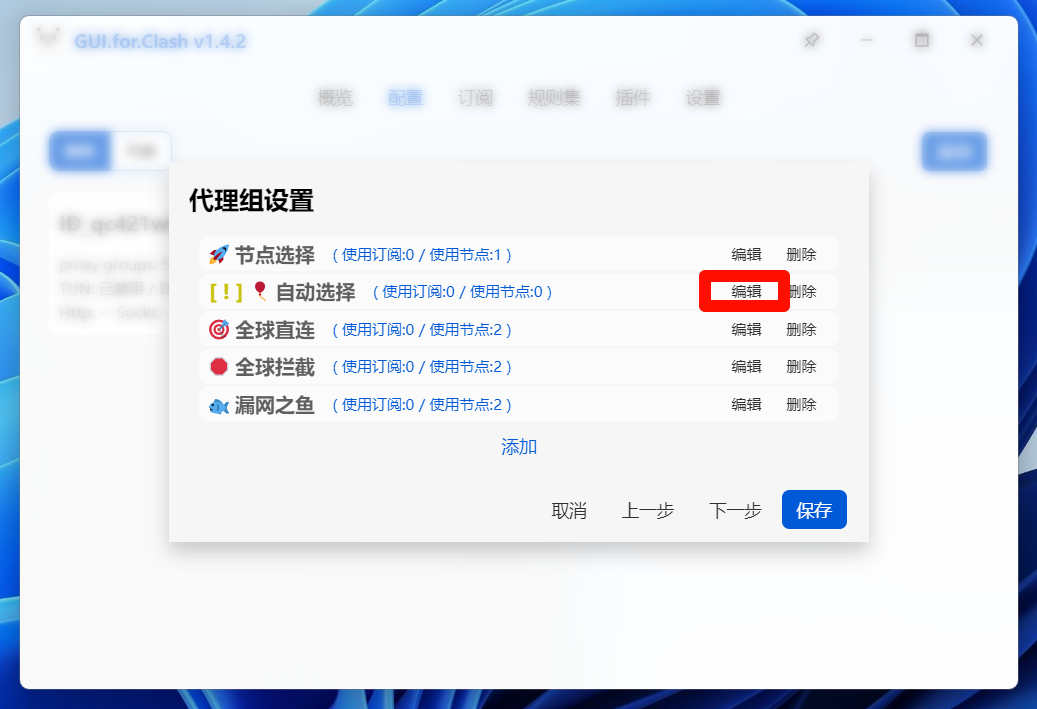
A newly created profile has some proxy-groups by default, as shown in the screenshot above. Each group requires at least one subscription or proxy, or an exclamation mark will appear on the left of the group name. Click on the Edit button and go to the next screenshot

Area 1 in the screenshot shows the proxies that has been added, including the built-in DIRECT and REJECT. Click on its name to add it to the current proxy group. The application has already disabled self-inclusion, but please note that circular inclusion is also not allowed. For example, in proxy-group A, proxy-group B is selected and in proxy-group B, proxy-group A is selected
Area 2 shows the subsciption list, click on its name to add it to the current proxy group
Area 3 shows each proxy in every subscription. Expand it and click on the proxy's name to add it to the current proxy group. This is convenient when multiple subscription are in use
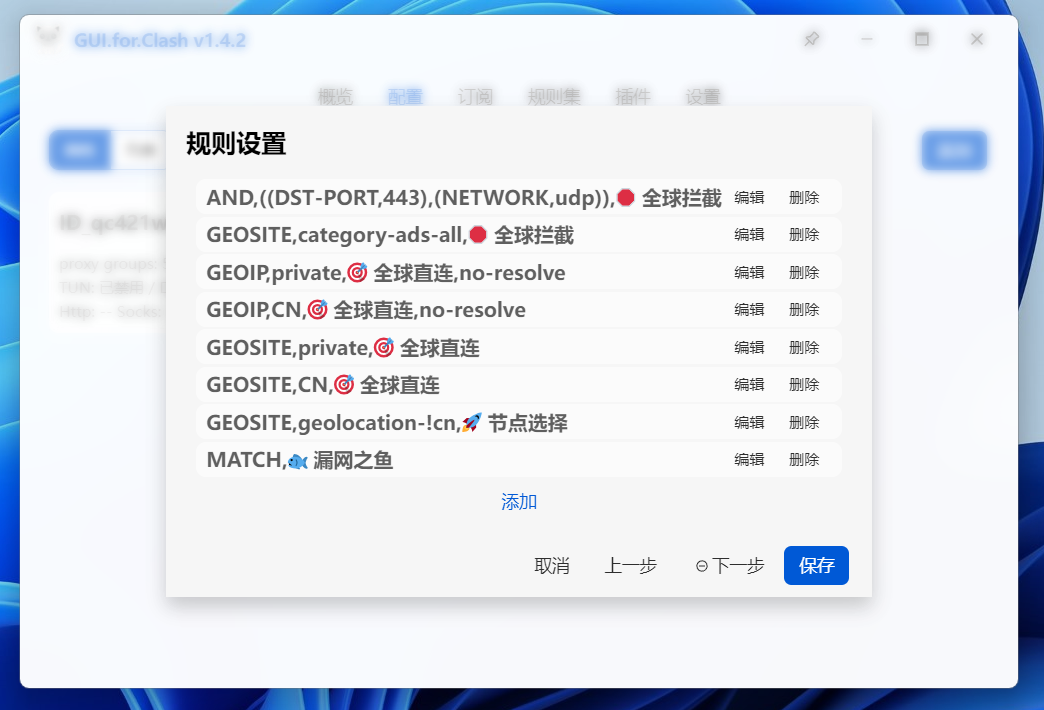
The Rules page corresponds to the rules segment in the core's configuration file. GUI did not change it to a clearer format because the users who are familiar with the core's configuration will find the current format more understandable
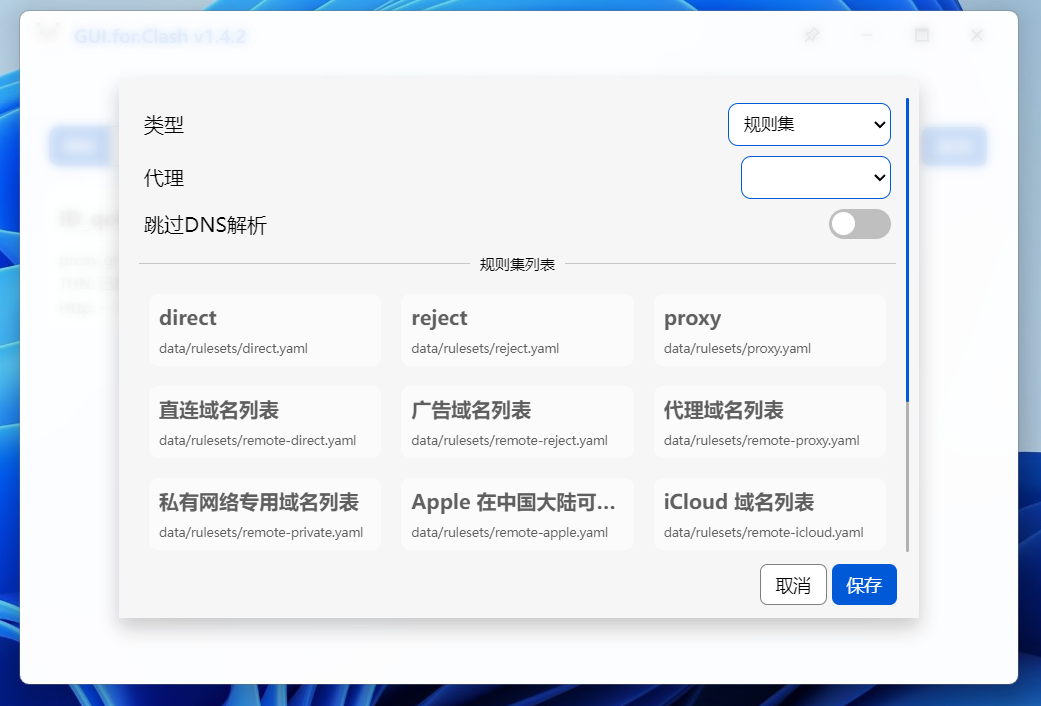
Click on the Add button, and a list of ruleset added by the application will appear, select one or multiple of them. If the ruleset list is empty, go to the Plugin-Hub and install the plugin 一键添加规则集 and then run it
If the GEOSITE or GEOIP rulesets are selected, please refer to this project for further configuration: MetaCubeX/meta-rules-dat